Fold paper to make matching butterfly wings, layer smaller coloured wings, add a body and antennae, then decorate and display.
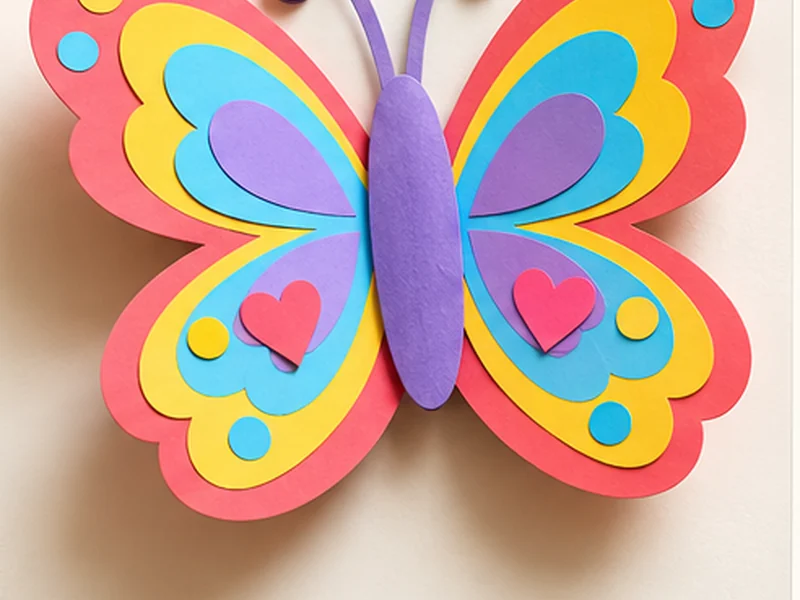
What you will learn
Folding and layering paper can create symmetry, pattern and dimension.
Skills: Folding, symmetry, colour harmony and paper composition
Jump to picture steps ↓What you’ll need
- Coloured craft paper
- Pencil
- Safety scissors with adult supervision
- Glue stick
- Scrap paper for small decorations
Get ready: Protect the table. Prepare safe scissors, a glue stick and larger paper shapes for younger children.
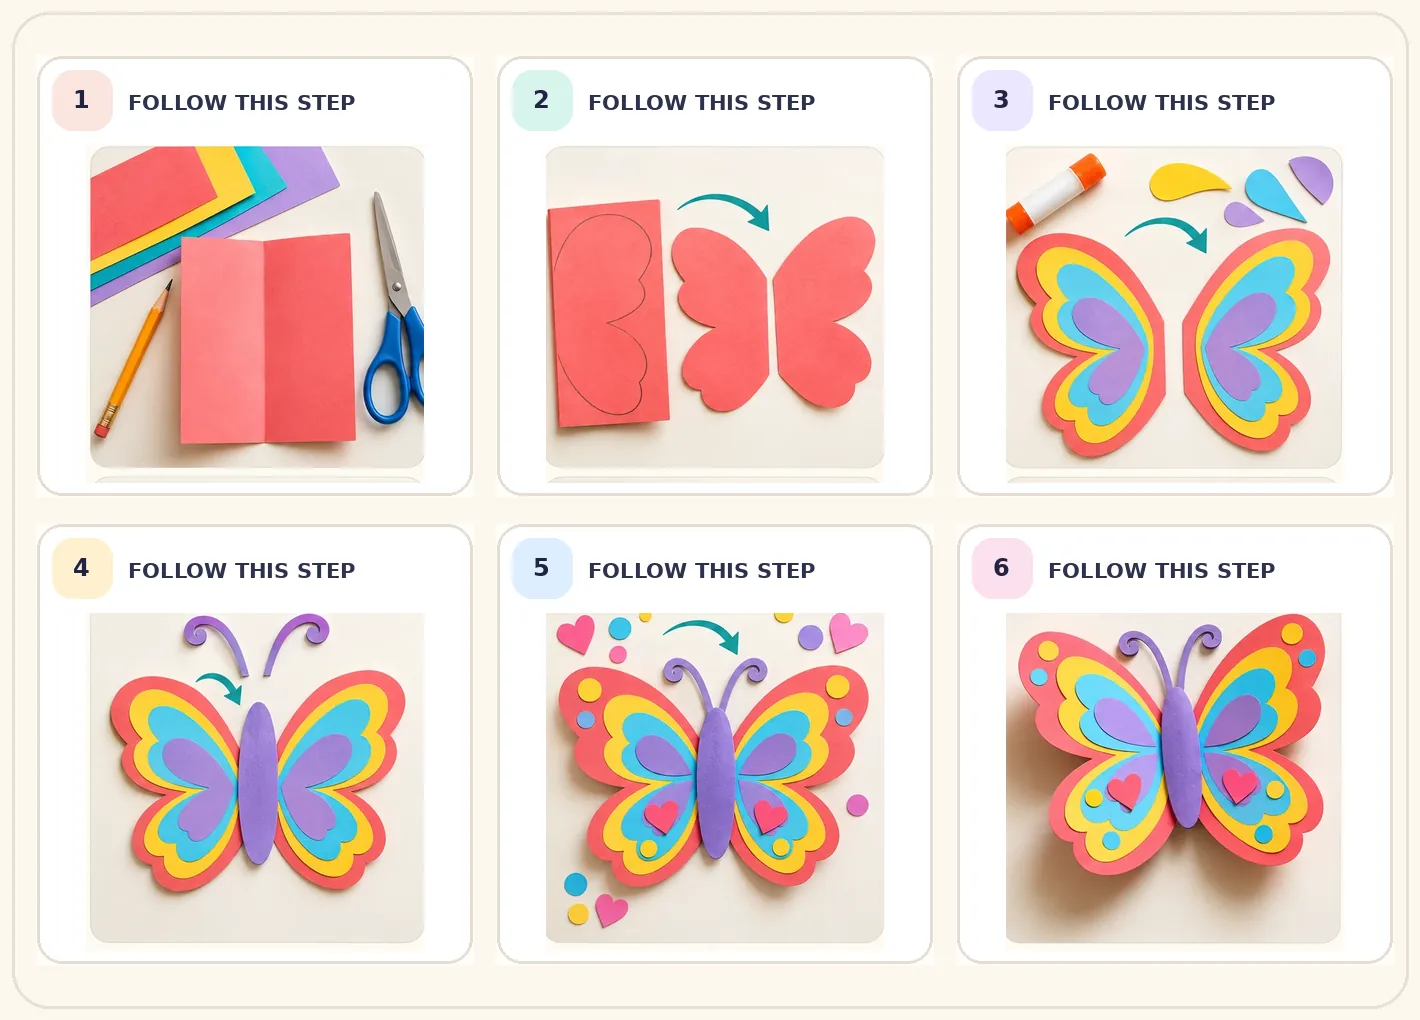
Make it, one picture at a time.
Look at the picture, try that step on your paper, then move to the next. Follow the numbered stages, then choose your own colours and details.
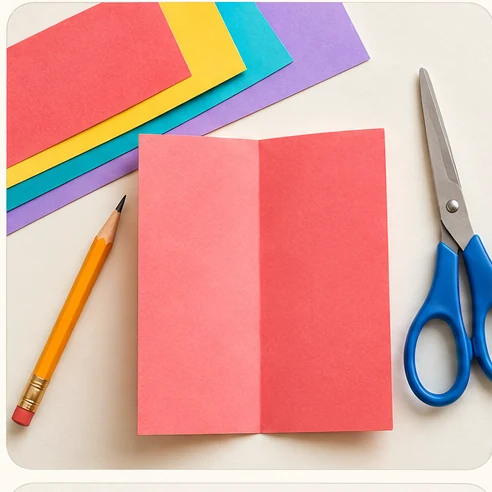 STEP 01
Choose colours, fold one sheet in half and prepare a pencil, scissors and glue. Ask an adult to help with cutting.
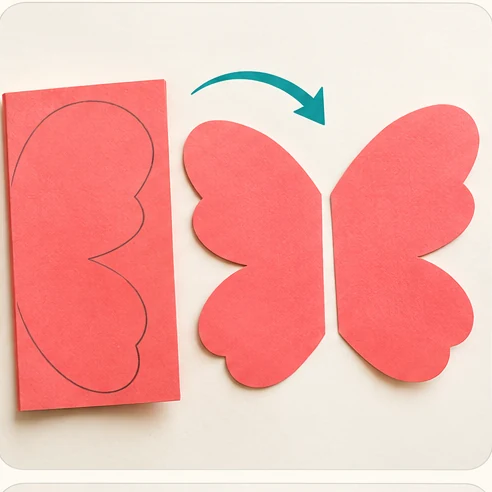 STEP 02
Draw half a butterfly wing against the fold. Cut around the outline and open the paper to reveal two matching wings.
 STEP 03
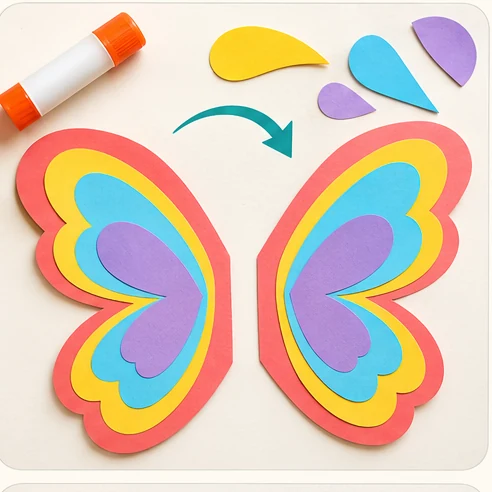
Cut smaller wing shapes in two contrasting colours and lay them over the large wings. Check both sides before gluing.
 STEP 04
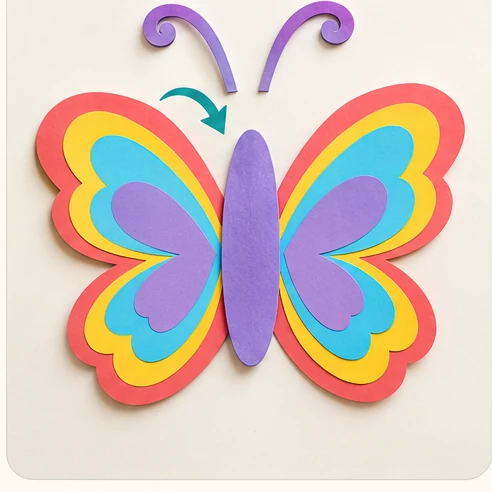
Cut an oval body and two curved antennae. Attach the wings behind the body to make one butterfly.
 STEP 05
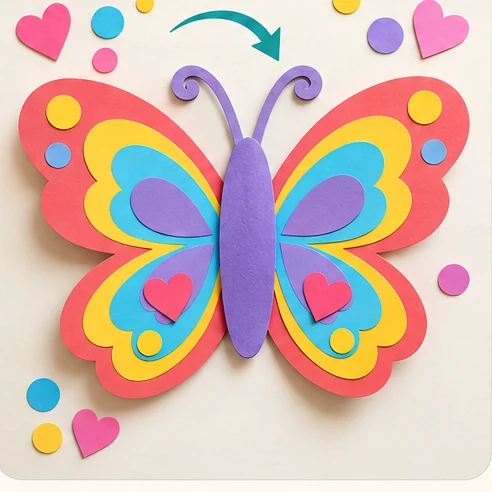
Add dots, hearts or shapes as a personal pattern. Press glued pieces gently, then allow the butterfly to dry.
 STEP 06
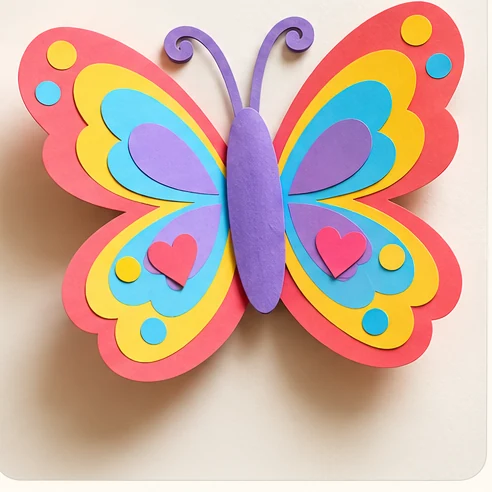
Lift the wings very slightly for depth and display the finished butterfly. Explain one design choice you made.
Make it your own
Children can choose different wing shapes, colours or patterns. Adults should handle tricky cuts and any small parts.
Talk about it: How did folding help you make two similar wings?
Help a young artist learn
These practical notes are for parents, carers and teachers. Children can follow the picture steps above.
For parents and carers — teach together
Start together
Protect the table. Prepare safe scissors, a glue stick and larger paper shapes for younger children.
During the activity
Help fold and cut, but let the child choose their own wing colours and decoration.
Afterwards
Ask: How did folding help you make two similar wings?
For teachers — classroom adaptation
Learning focus
Folding, symmetry, colour harmony and paper composition
Demonstrate and guide
Demonstrate a single fold and a half-wing cut. Provide pre-cut wings as an alternative.
Observe, do not grade the artwork
Ask learners to describe one choice they made and one thing they would try differently.
Make it easier or take it further
Make it easier
Use a single paper butterfly with crayons instead of layered shapes.
Extra challenge
Try three different symmetrical wing patterns or a hanging mobile.
Keep creating
Build a colourful paper-collage city
Use cut-out shapes to invent a street full of imaginative buildings.
Make a movable paper character
Create a simple character with arms and legs that can be moved for storytelling.
Activities are suggestions, not assessments. Adapt materials and supervise as needed.